Recently some clients of mine decided to take on a renovation project on a home they purchased close to Denver. The husband is an engineer and loves the process of design and fabrication and with a limited budget, it became clear that he would act as the general contractor (which is something that I don’t always recommend but in this case I am confident that he has the skill set to get it done correctly). Their home is not yet finished, but the following explanation goes over the experiences and tips they have learned thus far.
Budget
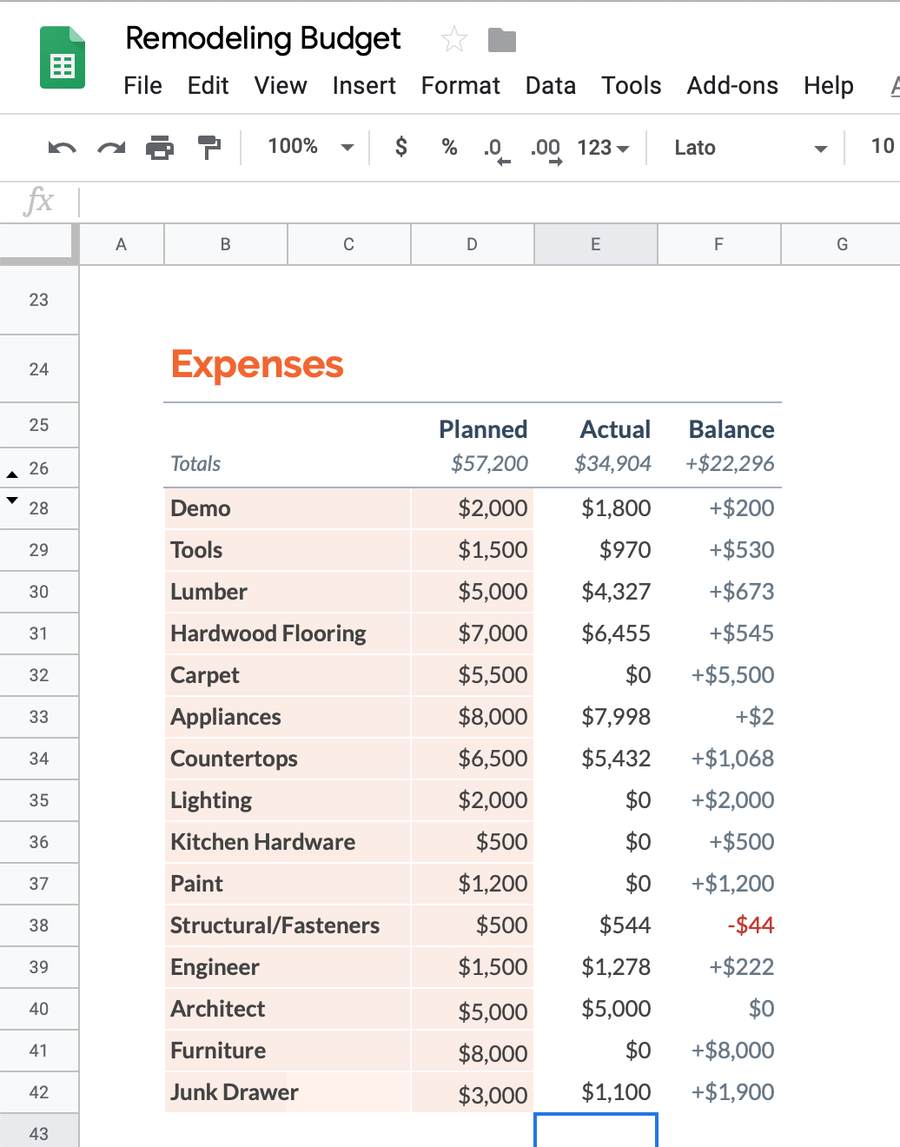
Determine your budget before you begin the project. As you create a line-item for each cost you can keep track of expenses and make decisions that are based on real numbers and less on emotional impulses. Get an estimate for the big items upfront and try to stick to it as it is so easy to just spend “a little more” to get something upgraded but those all add up in the end. If you're updating the kitchen, price out the appropriate style and cabinetry with the features that you want like soft close drawers/doors, special paint/stain colors, etc…as well as appliances, countertops, and flooring and put those costs into your spreadsheet first. Then begin to look at the less expensive items like the sink, lighting, backsplash, barstools, and other kitchen accessories like hardware. Take this number and add somewhere between 5-10% to allow for changes and possible upgrades while still keeping your total number under what you’re shooting for. When you have real numbers to work with, you can make wise decisions that will keep your budget in check. There will always be surprises that come up but by having realistic, doable numbers from the beginning it will help minimize those and prevent them from taking the project off the rails.
Demo
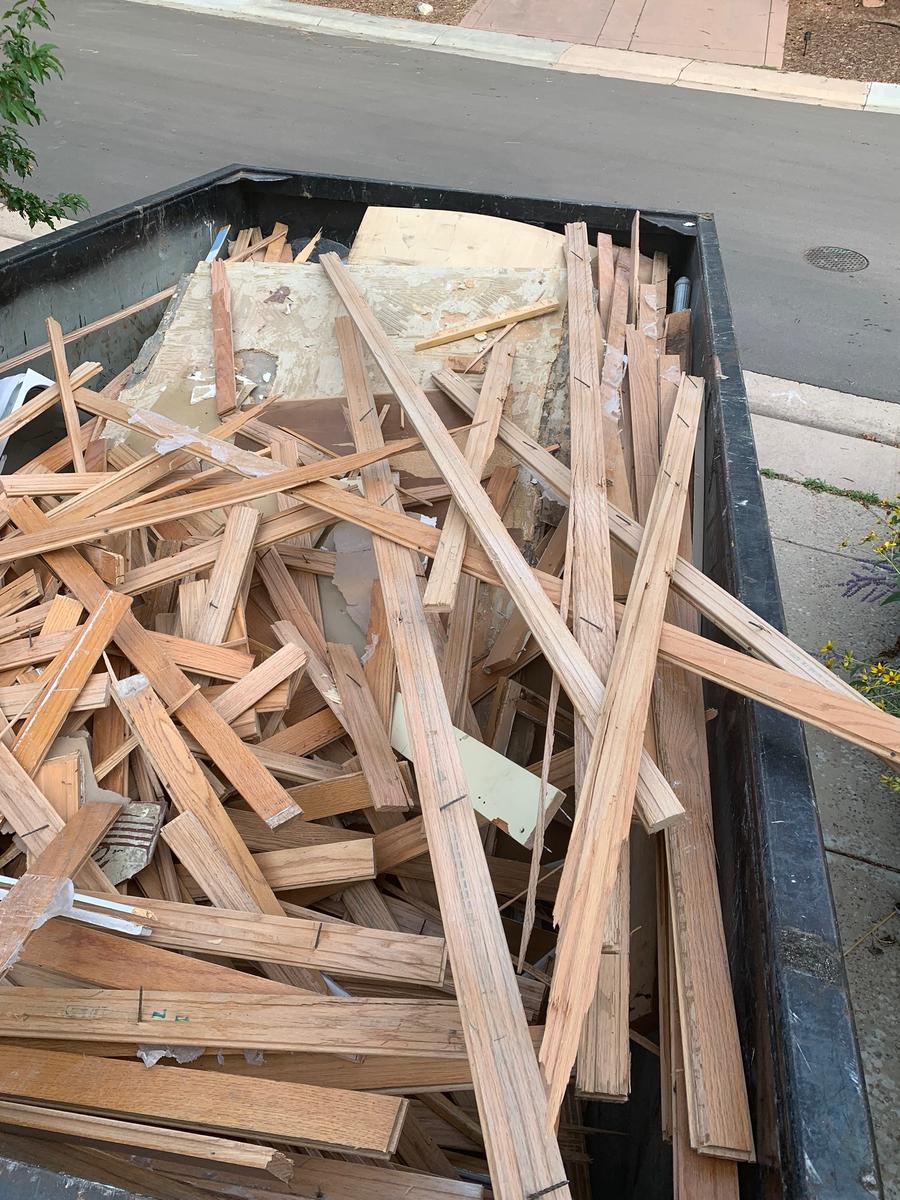
Taking down drywall and studs may seem relatively mindless but there is a process to it. A step that many homeowners and first-time flippers are unaware of is the importance of testing the home for asbestos and lead based paint. There is more leniency for owner occupants when it comes to this testing and how it is abated but regardless, it is a good idea to bring in professionals to test for these issues to make sure that you are not going to disrupt anything that could potentially be harmful to your health or cost you significant money down the road if they are not removed properly. If you do not know anyone who does this type of testing, give me a call and I am happy to connect you with some great local companies who do good work both for testing and abatement if necessary. Most municipalities will require proof (depending on the age of the home) that you have done the necessary testing before they will issue you a demo permit. Once you have a permit in hand, get a dumpster ordered that will allow you plenty of room for all your debris (as a rule, always overestimate when deciding what size to order). Check with the dumpster company to clarify what restrictions they have on what can’t be thrown out in the dumpster and if you need to make special arrangements for anything like paint, old A/C units, appliances, etc… Lastly, always wear the correct safety gear and a respirator mask when doing demo work! You wouldn’t believe the things I have seen over the years that could have been avoided by just giving a little more thought to safety and while you make look silly, it’s certainly better than the alternative.
Blueprints & Design
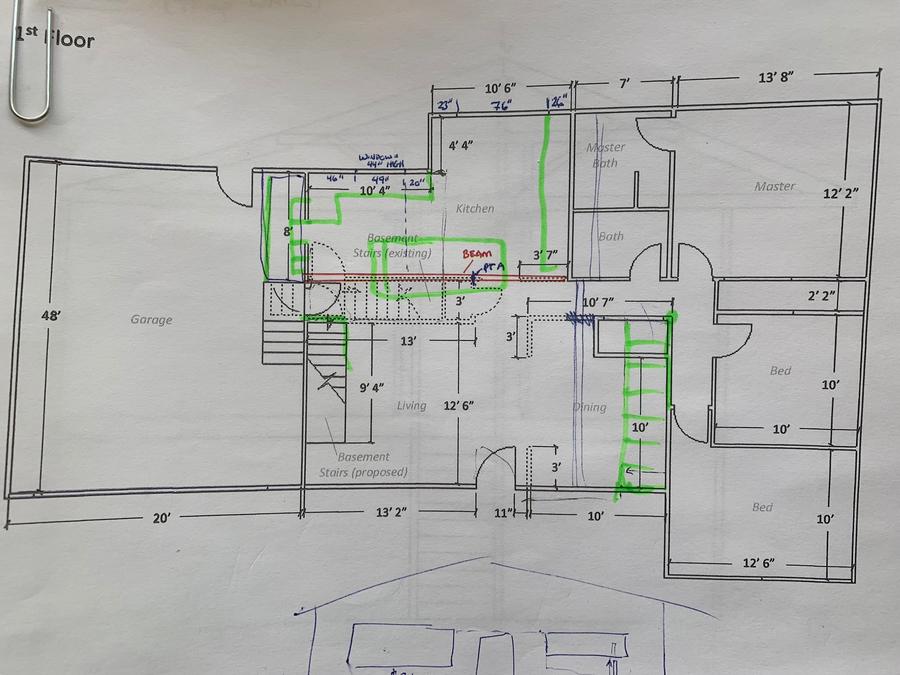
This is where the fun really begins for most people. To begin, dream of the space you would like to create while keeping in mind the limitations of the home when it comes to structural walls, plumbing locations and room layouts. For some people (like me!), it is hard to visualize what a space could be without some help. If that is the case, it may be worth bringing in an architect or interior designer to help you see all the possibilities and which options are going to be the most cost effective to help you stay on budget. For this particular home, they wanted to open up the living, dining, and kitchen space to create an open floor plan. In order to make this a reality, they needed to know which of the walls were currently load bearing and what they would be needed in order to keep the home properly supported. It is vital to call in a structural engineer to make sure that these changes are done correctly because if they are not, they can cause a HUGE amount of issues down the road. Measurements of the existing space were taken and ideas began to take form for which walls could be removed, identifying a more efficient location for the stairs, and a design for a whole new kitchen layout. Plans were initially drawn up on paper and then rendered into 3D format in order to see what the renovation would look like once completed. This kept their construction to code and determined which permits were necessary. Once the design was completed and signed off on by the engineer, the work could begin!
Order In Advance
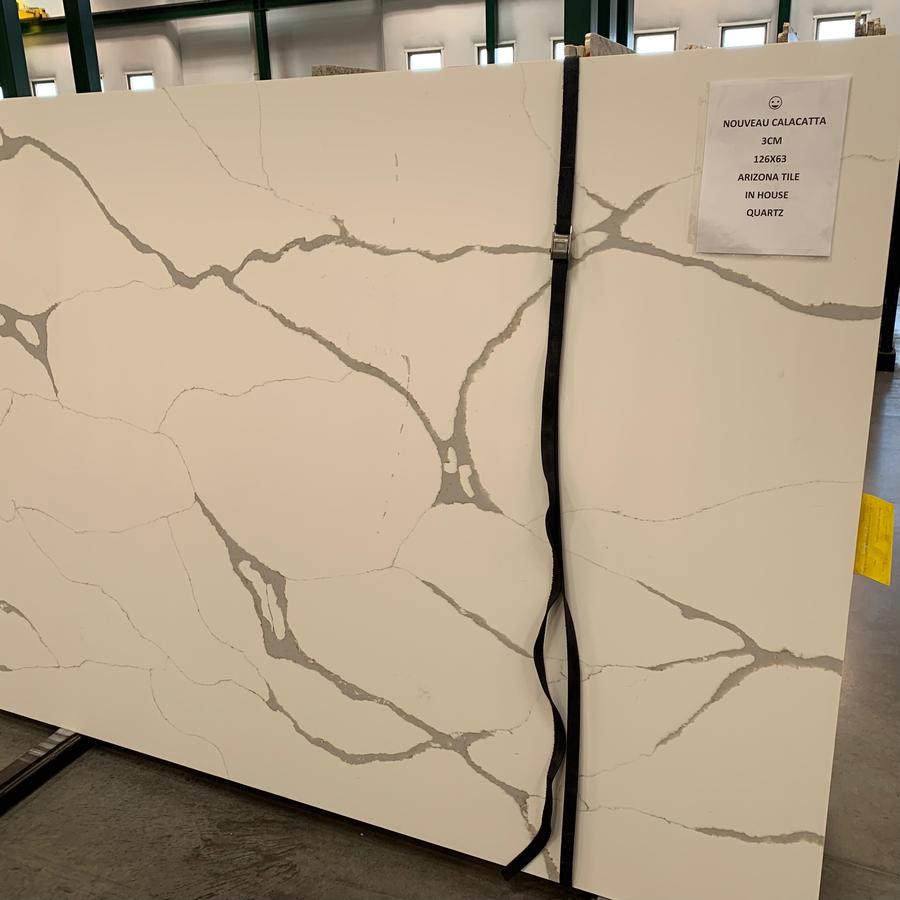
Once you’ve determined if you'd like to replace your cabinets or appliances, put in new flooring, install new windows or freshen up your countertops, think about the renovation time-frame and work backwards to determine when items need to be ordered. People often assume that turnaround times for these items is pretty quick but it is not uncommon for custom things like cabinets to take 4-6 weeks and there is nothing worse than hitting a point where you have to stop work while waiting for product to arrive. Think in terms of what items or fixtures need to be installed in what order and layout a timeline for when you will need things to arrive. For example, flooring would need to be laid prior to cabinets being installed and the cabinets will need to be installed before exact measurements can be taken for countertops. By laying out a timeline from the beginning, you will hopefully be able to avoid those frustrating and costly delays. The remodeling process is an intricate set of moving parts which needs to constantly be monitored and tweaked in order to maintain accurate timelines and efficiency.
Next month in Tips for Remodeling Your Home Part 2, we'll discuss installing the supporting beam, building a staircase and installing recessed lighting.